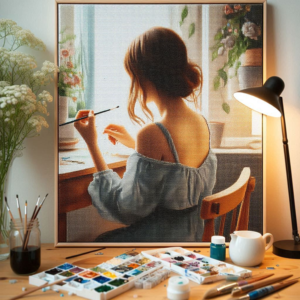
 Diamond painting offers a relaxing escape from the hustle of daily life, blending creativity with meticulous precision. It involves placing tiny, shimmering diamonds on a color-coded adhesive canvas to create stunning designs. Whether a beginner or an experienced crafter, anyone can find joy and tranquility in this artistic hobby.
Setting up your workspace is essential for an enjoyable diamond painting experience. Make sure you have ample lighting and a comfortable table, as these can significantly enhance your crafting sessions. Using tools like a diamond painting art kit can provide the necessary materials and instructions to get started.
For those seeking advanced techniques, pay close attention to the adhesive on your canvas. If the canvas loses stickiness, specialized glue for diamond painting can be a lifesaver. Additionally, gently flatten the canvas and keep your work area free from dust to maintain the quality of your artwork.
Key Takeaways
- Proper workspace setup enhances the overall experience
- Tools like a diamond painting art kit can aid both beginners and experts
- Specialized glue can fix adhesive issues and improve the painting’s longevity
Setting Up Your Diamond Painting Workspace
Creating an effective diamond painting workspace is essential for a successful and enjoyable crafting experience. This process involves choosing the right workspace and lighting, organizing your materials and tools, and preventing and managing common mistakes. Here are the key points for each area.
Choosing the Right Workspace and Lighting
Selecting the right workspace and lighting is crucial for diamond painting. A well-lit area helps reduce eye strain and improve precision. Ideally, use a light pad to enhance the visibility of the small diamonds and the adhesive canvas. Task lights or natural sunlight are also effective lighting options.
Choose a workspace that is comfortable and free from distractions. A dedicated table or desk works well. Ensure that the working surface is flat and stable to avoid disturbing the diamonds. A spare room, such as a guest room or office, provides a perfect environment for diamond painting. This allows you to leave your project undisturbed between sessions.
Organizing Your Materials and Tools
Organization is key to a smooth diamond painting experience. Keep your materials and tools within easy reach. Diamond painting kits usually include plastic trays, pens, wax, and tweezers. Invest in storage containers to keep different gemstones sorted. Labeling each container with the corresponding symbol from your canvas can save time.
Consider using small storage boxes or pill organizers for your diamonds. These containers help prevent spills and mix-ups. Keeping a clean and clutter-free workspace enhances your focus and efficiency. Baby wipes can be handy for quick cleaning of any adhesive residue.
Using masking tape or washi tape can help secure the edges of your adhesive canvas, preventing it from rolling up. Adhesive tools like glue are useful for fixing any loose diamonds.
Preventing and Managing Common Mistakes
Diamond painting can come with its own set of challenges. To prevent mistakes, always work on a flat surface. Watch out for air bubbles on the adhesive canvas, as these can cause issues with diamond placement. Use a ruler to smooth out any bubbles before starting your project.
Tools like tweezers are essential for correcting misplaced diamonds without damaging the canvas. If you accidentally place a diamond in the wrong spot, gently remove it with the tweezers and reapply it correctly.
For sticky fingers or accidental glue spots, baby wipes are effective for cleaning. Mistakes can happen, but managing them efficiently ensures your artwork remains pristine. Taking breaks and staying organized can help minimize errors while keeping the diamond painting experience enjoyable.
Mastering Diamond Painting Techniques
The optimal strategies for diamond painting ensure precise placement of drills, a polished finish, and proper care for your completed artwork. Master these techniques to elevate your craft and produce stunning results.
Applying Diamonds with Precision and Efficiency
Utilize a diamond applicator tool for accuracy. For larger areas, a multi-diamond applicator increases speed. Employ the checkerboard method for consistent alignment, especially with square drills. Use a light board to illuminate the canvas and distinguish symbols clearly, aiding in precise application.
Round drills are easier for beginners, offering a forgiving placement. Advanced artists may prefer square drills for a cohesive look. Consider using a magnifying glass if the symbols are small. Parchment paper over adhesive areas prevents dust and fuzz.
Technique and patience are critical for a rewarding experience. Keep dryer sheets nearby to reduce static cling on drills and use blu tack on the applicator to increase its effectiveness. Watching a tutorial video or joining a community can offer additional tips and inspiration.
Finishing and Sealing Your Artwork
Once all drills are placed, ensure your canvas is flat. Use a rolling pin to press down the drills firmly onto the poured glue base. For sealing, apply a thin coat of mod podge or specialized sealant to protect the drills and enhance the artwork’s durability.
Place parchment paper over the canvas and lightly press with a rolling pin for even pressure. Make sure the sealant is evenly distributed without obscuring the shine of the resin drills. Allow the sealant to dry completely before moving to the display stage.
High-quality sealing maintains the polished appearance and prevents loss of drills. Be delicate during this stage to avoid disrupting the alignment. Proper finishing ensures the artwork remains flawless and vibrant.
Displaying and Caring for Your Finished Piece
After sealing, consider framing your diamond painting to preserve its quality. Choose a frame that fits the canvas size and complements the artwork’s theme. Egg cartons can be repurposed to store and transport smaller projects safely. Shadow boxes are excellent for adding depth.
Maintain the painting by dusting gently with a cloth to keep it looking fresh. Avoid direct sunlight to prevent fading of colors. Rotate displayed pieces to enhance longevity.
Displaying framed diamond paintings reflects professional craftsmanship and lets the beauty of your work shine. Proper care includes regular inspection and maintenance to ensure the artwork remains pristine over the years. Engaging with a community of artists can offer further tips and ideas for showcasing your craft project.
Conclusion
Implementing the right techniques can significantly enhance the diamond painting experience. Small, actionable tips such as working in sections, using the right tools, and maintaining a clean workspace can lead to impressive results.
Adhering to expert advice helps in creating stunning artwork with ease and precision. Consistency and patience remain key to mastering diamond painting.


