Decorating an entire home, or even renovating one room, can sometimes be a daunting task. Though it’s easy enough to collect lots of ideas and inspirational photos, plenty of people quickly become overwhelmed at the thought of actually implementing their many ideas. And rightfully so – pulling together a thoughtfully curated space takes a lot of time, effort, and attention to detail. If it were quick and easy, I would be out of a job! So where does one begin? How do professional designers manage big projects and make it all seem so streamlined, simple, and fun?
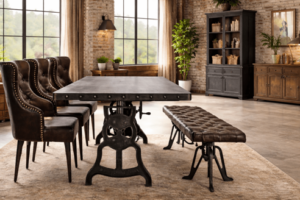
At right, Measure and photograph any furniture you plan to re-use in your new room. Be sure to record the height, width, and depth of each piece.
The key to tackling design work like a pro is to plan like one. Contrary to what HGTV would have you believe, it’s not all lattes, shopping sprees, and craft projects. In fact, professional
designers spend the bulk of their design time in the office, sitting at a desk. Successful decorators are organized from the very beginning of a project; they plan ahead and select every single item – from wallpaper to chairs to lighting fixtures – before making any permanent purchases. This type of detailed planning ensures a room comes together cohesively and within budget.
Follow these simple tips of the trade to organize your design project and break it down into a few manageable and very do-able steps.
Get Organized – It’s best to begin any project with all of your tools at hand, and design work is no different. Dedicate a plastic bin or sturdy storage box to your project. Stock it with graph paper, plenty of pencils with erasers, a calculator, and a tape measure. A scale ruler will be helpful, if you know how to use one. A three-ring binder is perfect for corralling all of your design ideas, shopping lists, and favorite finds. Fill your Project Binder with plain notebook paper and some clear sheet protectors for storing inspirational photos and catalog pages. If you are
working on multiple rooms, I recommend using a separate binder for each room. A camera is another must-have, and it’s important to have a printer that will print out reasonable quality color photos.
Interview Your Client – When interior designers first discuss a project with clients, they run through a litany of detailed questions that have nothing to do with favorite colors and everything to do with the way the client actually lives. This is the time to really think about all the ways you would like to use your space. Consider who will be using it. Are children or pets involved? How many people should be able to sit comfortably at once? At what time of day will you use the room, and what kind of emotions do you want it to invoke? What items need to be stored here? Do you have special lighting needs? Will there be a lot of electrical equipment and corresponding cords? Be brutally honest with yourself when considering your room and your life; you may like the idea of an all white room in which poised adults sip Chardonnay, but the reality of young children, cheerio crumbs, and large dogs may overrule that vision. Remember that the goal of every design project is to create a beautiful backdrop for the life you are already living, NOT a space that is just pretty to walk past. Write up your checklist of “Must Haves” and add this to your Project Binder. You will continuously refer back to this list throughout the design process to ensure you are designing a room you’ll actually use. (Visit WestchesterDecorator.blogspot.com for a complete Client Questionnaire.)
Make a List of Items to Keep – Take an inventory of any items you already own that you would like to re-use including furniture, lighting, artwork, and rugs. Add this list to your Project Binder and be sure to include each item’s dimensions in inches (Width x Depth x Height). Take a clear, well-lighted photograph of each piece. Print these out as 3”x5” color pictures and note the
dimensions on each photo. Keep these pictures together in an envelope or clear plastic sleeve in your binder. You will use them later in the Design Process.
Organize your Inspiration – If you haven’t collected magazine photos of rooms you love yet, now is the time to do so! This is my favorite part! Place all of your tear sheets in clear sheet protectors in your binders and flip through them to locate common themes. Do they all have soft, cool colors or do you gravitate more towards warm, earthy tones? Do the pictures tend to look spare, minimal, and have lots of wide open tabletops and floorspace or are they photos of quirky rooms, full of curios and family photographs? After going through all your photos, write down the top five words or phrases that they evoke to you. For example, your pictures might all have these five common traits: Light, Airy, Cushy Seating, Ocean Greens and Blues, Simplicity. (Just these five short phrases already conjures up a style in your mind, don’t they?) Add this list of five words or phrases to the bottom of your “Must Have” List in your Project Binder.
Now you have your supplies, your ideas, and your existing pieces organized and in one place. You’re on your way to decorating like a pro! We’ll cover Part II – Designing Your Space in the next issue.
[blockquote class=blue]Kitty Burruss is an interior designer, wife, mother, and author of The Westchester Decorator blog. After 10 months in her new home, she is still stuck in Part I of the Decorating Process.[/blockquote]