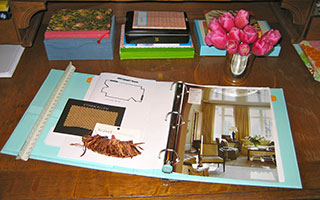
 Now that you’ve thoroughly considered all of your design needs and organized your ideas and existing pieces as a professional decorator would, it’s time to tackle the actual design work. In other words, it’s time for the FUN part!
Draw a Floorplan – You’ll first need to draw up a basic floorplan of your space. Sketch up a rough outline of your room on your graphing paper, and be sure to include any door openings, windows, or other architectural elements that will affect furniture placement, like built-in bookcases or a fireplace. Using your tape measure, measure the perimeter of your room, beginning in one corner and working your way around. Fill in each corresponding measurement on your sketch. During this step, you may consider some of the more permanent changes you would like to make such as getting a residential window replacement, or changing the flooring of the room.
Once you complete your original floorplan, you can draw it to scale using one of two methods. Professional designers draw up precise floorplans, similar to an architect’s blueprints, using a scale rule. If you would like to try drawing your floorplan to scale using this method, I’ve posted detailed instructions at WestchesterDecorator.blogspot.com. For a simpler, though less precise, way to draw your room to scale, create a basic, rough scale on a second piece of graphing paper (such as 5 cubes is equal to 1 foot) and re-draw the perimeter of your room to scale, based on the measurements you noted on your original sketch. When you’ve completed your floorplan to scale, make several photo copies of it. You can use the copies to sketch up your furniture layouts. I recommend keeping your original draft, free of sketches and notes, in your Project Binder in case you need to make additional copies in the future.
Determine the best Furniture Layout – Now you can begin sketching in furniture pieces on your floorplan. You don’t have to draw things perfectly; simple blocks that take up the proper amount of space will suffice. Go to a popular furniture retailer’s website to find out common dimensions for items like sofas, club chairs, and coffee tables to get yourself started. You’ll need to adjust your floorplan when you select actual pieces in order to determine if their true dimensions will fit your space, but you can create the basic furniture plan with rough dimensions.
Remember how you documented all the items you want to re-use back in Part I? Pull out those photos and dimensions and include them in your plan. Be sure to refer back to your “Must Have” List as you create your furniture layout; you want to make sure you are incorporating not only all of the “Items to Re-Use,” but are solving for all of your “Must Haves” as well (enough seating, storage, etc.). You may go through several different furniture layouts before finding the perfect one to suit all of your needs. Don’t worry; this is what all those extra copies of your floorplan are for!
Create a Shopping List – Once you’ve finalized your furniture layout, you can create your Shopping List. Write your budget on the top of your Shopping List and then list any projects that will require hired labor, followed by all of the pieces you will need to complete your space, including their ideal dimensions. Before you do any furniture shopping, research pricing for all outside labor, such as hiring an electrician or getting your sofa reupholstered, and pencil in these estimates on your list. The amount remaining in your budget, after you pay for the labor, is your furniture budget.
Create a Color Palette – Based on all of the inspiration photos you collected in your Project Binder, you should have a good idea of the color palette you’d like to use in the room. Cut out the colors you want to use, either from your inspirational photos or from other magazines, paint swatches, or fabrics you may have collected, and paste them all together onto on a large board. Place this board in the room you’re designing. Do you like these colors in here at all times of the day? Does it flow well to the adjoining rooms and look good from the hallway? Adjust your board until you’ve finalized your color palette. Then take a close-up photo of your board and place it in your Project Binder.
Start Shopping – Armed with your Project Binder, which now contains your Shopping List & Color Palette, you can start shopping! Warning: this does not always mean buying. In fact, I suggest you begin shopping in your own home. Take a walk through other rooms – some of the items on your list might be hiding in a guest room or lingering forgotten up in the attic. After you’ve shopped your own home, get online and research various retailers price points to determine which shops will fit into your budget. Once you have a general sense of pricing, hit the brick and mortar shops. Many of the big retailers now offer a variety of ways to customize your selections, and Main Street in Tarrytown has an incredible variety of shops brimming with unique finds at all price points. Refer back to your Five Words frequently; does each object you pick evoke the feeling you’re trying to create in the room? Keeping these Five Words handy while you shop will help ensure you stay on track style-wise. When you find items you love, photograph them, and note their dimensions and price.
Look at the Big Picture – Collect your fabric swatches, paint chips, and photographs of all the pieces you find in your binder. Make sure the dimensions fit with what you’ve noted on your Shopping List, and fill in the prices to ensure you’re staying within your budget. Look at all the pictures you’ve taken together – pin them on a large poster board – and make sure you like how they look next to one another. Refer back to your Five Words and your Must Have list; does your board of photos evoke those Five Words and fulfill all of your Must Haves? When you can answer “yes” to these questions, you’ve found your design.
Schedule & Purchase – Last, but not least, schedule any outside labor and make your purchases. If you’re having the room painted or any other major work done, try to schedule furniture deliveries to take place AFTER the contractors have finished their work. Be sure to hold on to receipts for all of your orders and for any labor. Keep these receipts in your Project Binder, along with paint swatches, fabric clippings, and the business cards of any salesmen or craftsmen who have helped you along the way. You now have a record of all your design decisions, purchases, and work, which will come in super handy if anything needs to be replaced or repaired down the line.
Congratulations! You’ve just decorated like a pro!
[blockquote class=blue]Kitty Burruss is an interior designer, wife, mother, and author of The Westchester Decorator blog. After 10 months in her new home, she is still stuck in Part I of the Decorating Process.[/blockquote]


