 Once you’ve pulled together a collection of artwork and items you’d like to hang in your home, it can be tough to figure out the best way to show them off. Rather than haphazardly hanging things up as you move from room to room, I recommend putting all of your artwork out on the dining room table or someplace safe on the floor where you can see everything at once. This allows you to really take stock of what you have and what looks nice together.
Sometimes when you put all of your artwork together like this, a theme among several pieces will show itself – you may discover that a lot of your pieces focus on bodies of water, people, or have lots of vibrant, bright colors in them. This will help you decide how to group your pieces when you hang them and give you insight into what you’re drawn to as you add to your collection in the future.
Next, gather all of the tools you’ll need to hang your collection. This includes a hammer, sturdy picture hooks that can hold plenty of weight, painters tape, a pencil, scissors, and either Kraft paper, old newspapers, or brown paper bags you can cut to size. If you’re planning to hang any trays or platters, I like to use the Container Store’s adhesive plate hangers, which attach directly to the back of plates and make hanging them a breeze. You may also want a measuring tape on hand if you plan to create a “gallery wall” look, but it’s not always necessary. When hanging your artwork, it’s key to remember that it’s all about how it looks to the naked eye, not that everything is precisely 10” above the furniture. In this case, if something looks right to the eye, the measurements can take a hike!
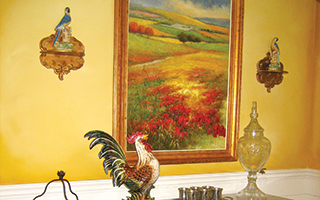
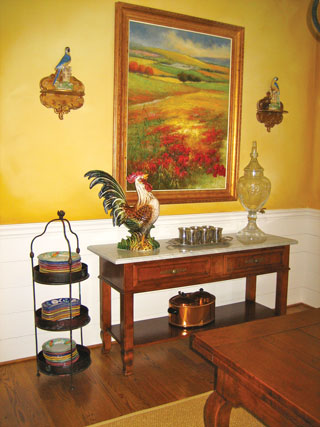
 Have a piece of artwork or a mirror you want to use as a major focal point? Designers have a few tricks to amplify pieces they want to use in a specific spot, but that are a bit small for the given wall space. Flanking a painting or mirror with sconces – candle or hard-wired electric ones – is a great way to give it a bit more presence, as is surrounding it with a collection of decorative plates. Brackets displaying urns or small figurines are another way to give a piece some heft and add a little glamour as well.
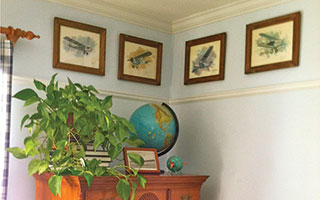
Another way to set off artwork is to work with architectural details in your home. Placing a piece in a wall niche or on a stair landing can make a simple photograph or a very small painting feel like something special; giving a piece its own little star spot where it has no visual competition can lend it a real sense of importance. Add a cordless picture light, in a finish to match your frame, for even more appeal. Architectural molding can also be used to draw attention to an individual piece or a beloved collection. A simple piece of chair rail placed a few feet below crown molding can create a space specifically made for hanging a collection of plates or framed prints.
Don’t limit yourself to large blank walls! Artwork and mirrors can be beautiful in places you might not initially think of hanging them. Try displaying a picture on the front of a bookshelf for a classic, old library feel – just make sure it’s not covering books you reference often. Hanging items in the space above a doorway draws the eye up and makes ceilings feel higher. Have a window looking out on the neighbors’ driveway and overflowing trash cans? Suspend an attractive landscape in the middle of the window to allow light to still spill in, but vastly improve your view.
 Right now, the “gallery wall” look is all the rage in catalogs, magazines, and design blogs. Getting it right can seem a bit intimidating, but there are a few easy guidelines you can use to pull one together like a pro. Group “like” pieces together to create the sense of a curated collection – a wall of vacation photos and mementos, a collection of black and white photos, or even something as general as a water theme can unify otherwise seemingly disparate pieces into what appears to be an intentional collection. If your artwork doesn’t have a common subject matter, you can also unify pieces by presenting them in identical frames. If you’re not up for buying a bunch of new frames, just paint the ones you have all one color, like a high gloss black or a bright Kelly green. If you’re mixing a variety of frames, strive for a balance of heavy and lighter, airier frames, and don’t be afraid to mix in a mirror or pretty platter if you need a filler to balance out your composition. It’s much easier to find a plate or mirror in a specific size and shape than a piece of artwork!
To install your own gallery wall, lay out all of the pieces you’d like to use on kraft paper or old newspaper and trace them. Cut out each piece and label it. Once you’ve arranged your artwork in a pleasing pattern on the floor, use painters tape to replicate the pattern on the wall with your paper cut-outs. Using your measuring tape, measure from the top of the actual artwork’s frame to where the nail needs to connect with the picture hanger or wire, then do the same on your paper cut-outs on the wall and mark the spot with a pencil. Drive in your nail, tear off the cut-out, and hang your picture. I suggest hanging one picture at a time, so you can make slight adjustments as you go. It’s much easier to move a few paper cut-outs, than pull out a dozen nails!
However you decide to display your artwork, I hope you are inspired to fill your home with beautiful things you love to see every day. Happy Hanging!
[blockquote class=blue]Kitty Burruss is an interior designer, wife, and mother. She was inspired to pull out all of her unpacked artwork in the course of writing this column, and hasn’t seen the top of her dining table since. For more ideas on how to display your artwork, visit www.WestchesterDecorator.blogspot.com.[/blockquote]


